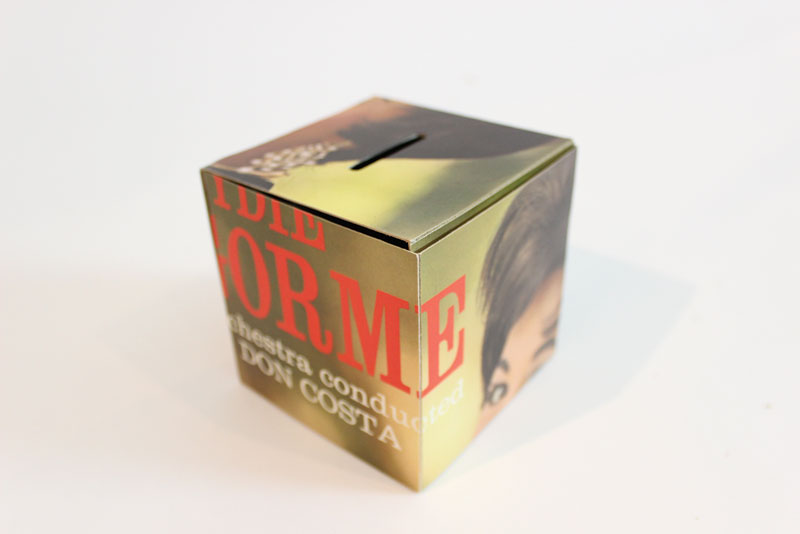
Making a tzedakah box is a fun craft activity for kids from eight to 80, and creating the box provides a valuable lesson in the importance of charity. This tzedakah box made from an up-cycled record album cover is eco-friendly, so it’s good for the community – and the environment.
Of course, I don’t encourage you to sacrifice a prized record from your collection. Step away from that Beatles White Album. Instead, look in thrift shops and garage sales for old albums with interesting artwork. I actually found the Eydie Gorme album pictured here at the thrift store. It didn’t even come with the vinyl record inside, so the clerk gave it to me for free.
And yes, I have made a tzedakah box from a Neil Sedaka album cover – which proves that although breaking up is hard to do, making your own tzedakah box isn’t.
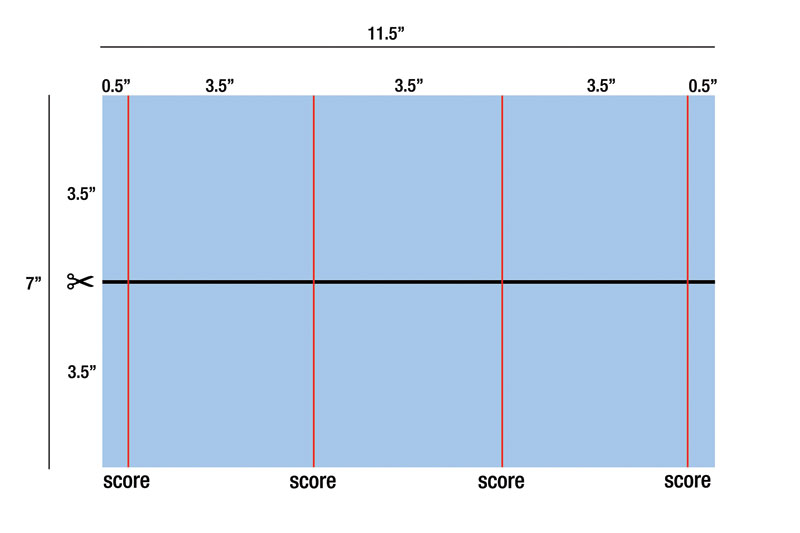
Follow this template in cutting the album cover. It indicates how large of a section to cut out of the album cover (11 ½” x 7”). The black line indicates where to cut this section in half, and the red lines indicate where to score the cardboard.
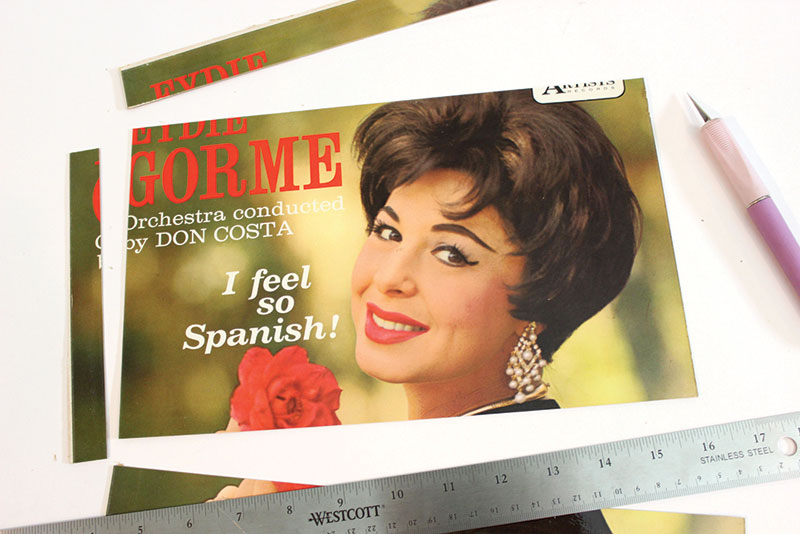
1. To make a 3 ½” x 3 ½” box, cut an 11 ½” x 7” section from the cover with a hobby knife. Choose a section of the album cover with the most colorful graphics and type. (Warning: hobby knives [like X-Acto knives]are very sharp, so only an adult should use them.)
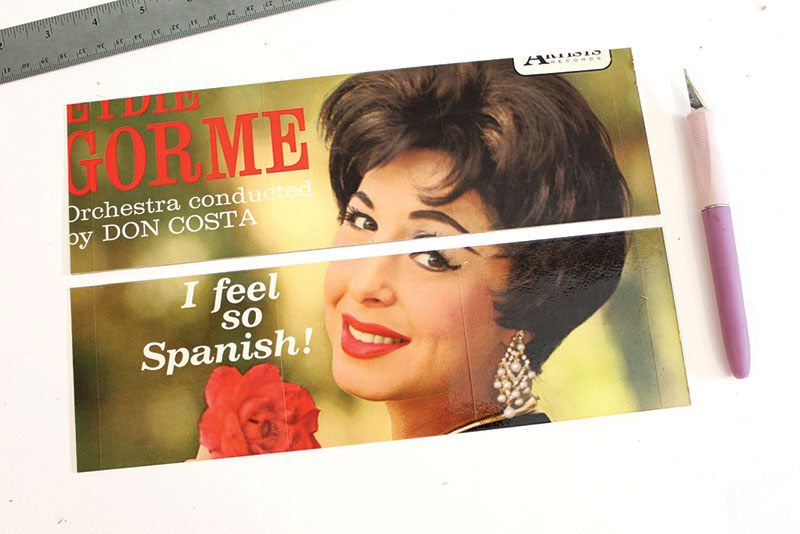
2. Scoring is the process of creating an indented line in the cardboard so you can make clean, defined folds. To make a score line, run a hobby knife along the straight edge of a ruler very lightly; you want the knife to only make a mark without cutting into the paper. Following the red lines in the template, score the cardboard to create three 3 ½” sections with two ½” flaps at both ends. Then cut this piece in half lengthwise.
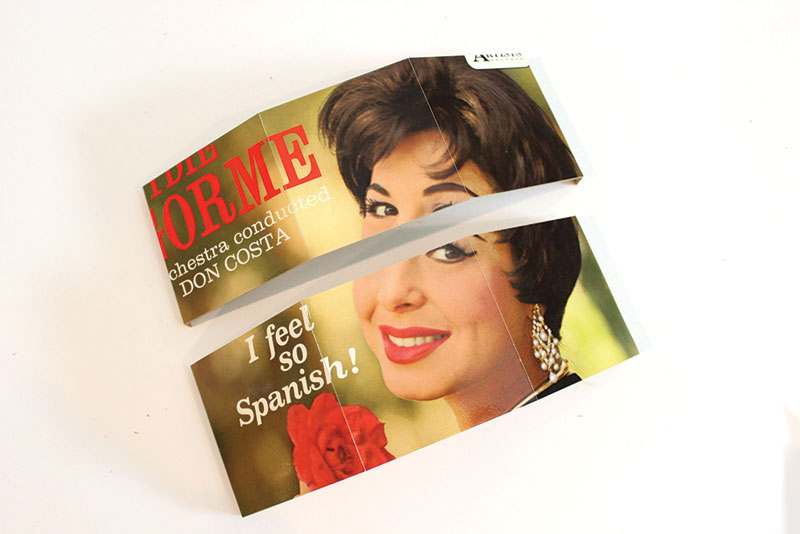
3. You will now have two pieces that are each 3 ½” x 11 ½”. Bend the cardboard where you scored it to reveal the six sides that will make up the box, plus the flaps to connect the two pieces.
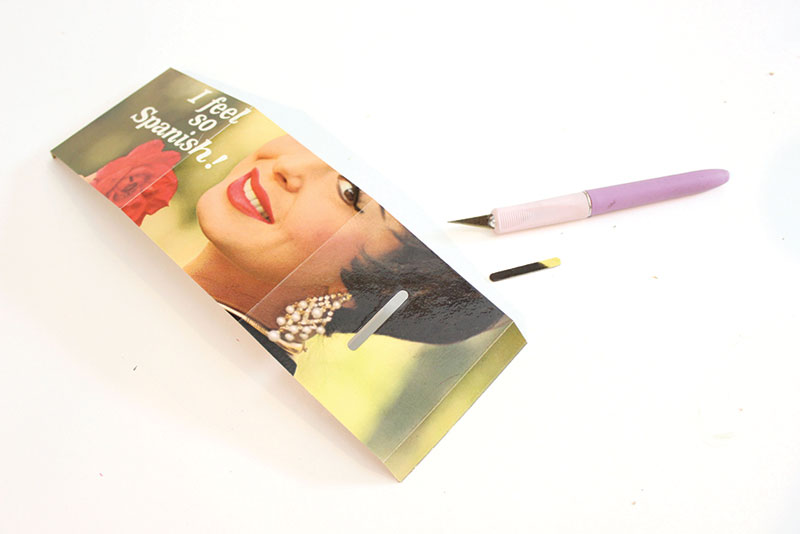
4. Pick one end of one of the pieces to be the top side of the box. The top always needs to be at the end with a flap piece so the box can be opened. Using a hobby knife, cut a slit in the middle to make a coin slot.
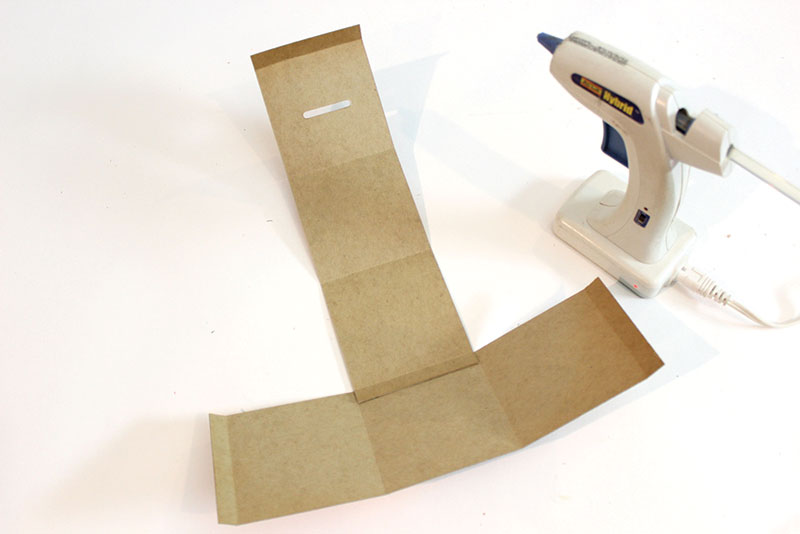
5. Hot glue the end flap of one piece to the edge of the middle section of the second piece. Make sure that the side with the coin slot is at the opposite end of the glued flap. (Another safety note: Keep kids away from the hot glue gun.)

6. Folding the box into itself, hot glue the two flaps on the second piece to the middle of section of the first piece. There will be two edges at the bottom of the box that are open and not connected by flaps. To prevent coins from falling out of these openings, cover these edges with duct tape. Finally, close the lid of the box. Don’t glue the flap to the top, or you won’t be able to open it again.
Jonathan Fong is the author of “Flowers That Wow” and “Parties That Wow,” and host of “Style With a Smile” on YouTube. You can see more of his do-it-yourself projects at jonathanfongstyle.com.


