When you think of mom and some of your favorite foods, what memories come to mind?
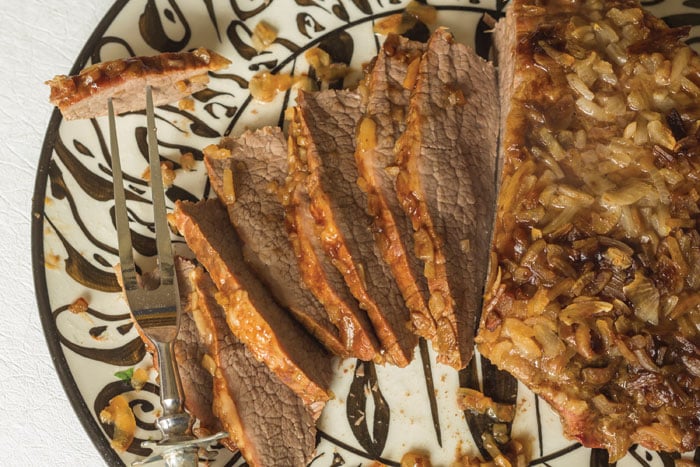
For Jewish Journal’s entertainment reporter Brian Fishbach, that food is brisket.
Growing up in Milwaukee, he had his mom’s delicious brisket countless times at home. However, the memory that stands out is enjoying the brisket on a special evening, during his confirmation class.
“Our instructor asked each student to bring in a multigenerational family recipe,” Fishbach said.
She intended to combine them all into a packet for everyone to take home.
“Being the meat-eating, grass-fed [Wisconsin] Packers fans that we were, the majority of my classmates brought in a brisket recipe — myself included,” he said.
The instructor, Trudy Sirkis, decided to do a potluck taste testing of five of the families’ recipes. Trudy prepared the briskets ahead of time, so everyone could eat them in class.
“It was probably the best day of class that year,” Fishbach said. “My mom’s recipe was my favorite.”
Susan Fishbach’s Brisket
5-6 lb. first-cut brisket
2 onions sliced
¾ cup brown sugar
½ cup vinegar (white or apple cider)
1 cup ketchup
1 cup water
salt and pepper to taste
Preheat the oven 350°F.
Place brisket in a roasting pan, fat side up. Spread onions around and on top of brisket
Combine the rest of the ingredients in a bowl, mix well. Pour over the brisket.
Cover roasting pan (use aluminum foil if no lid to pan is available). Roast in the oven for 3 to 4 hours. Check at 2 hours and add more water if not enough liquid remains in the pan).
Let cool.
Slice against the grain. Then place slices back into the pan in juices.
Refrigerate or freeze.
Chef’s note: Brisket tastes much better after being refrigerated for a day or defrosted from frozen; don’t eat it straight out of the oven. It will likely still be a bit chewy.
Another chef’s note: Some recipes call for browning the brisket first. I’ve never done it, but it may be done. Then add the rest of the ingredients and roast.
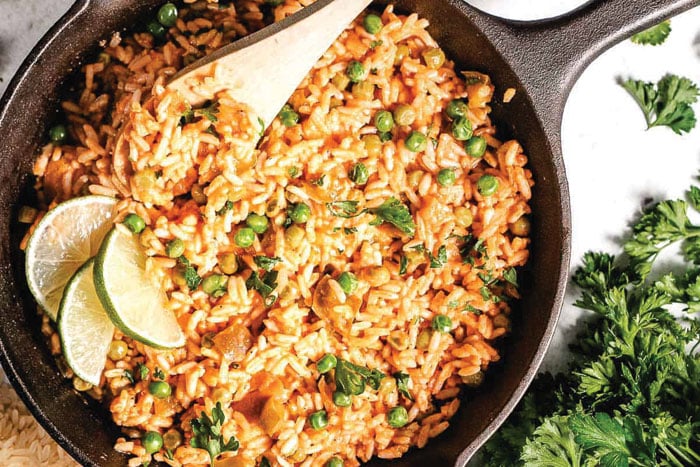
Felice Kaufman, who writes a blog called Cooking in The Keys, loves her mom’s Spanish rice. “My mother, Pearl Liebman, was born in Havana, Cuba,” Kaufman told the Journal. “For the holidays, next to the kasha varnishkes and noodle kugel, there was always a big bowl of Spanish rice on the table.“
She explained that Spanish rice is a flavorful and colorful dish made by cooking white rice with onions, garlic, tomato sauce and peas. It’s parve, so it can be a side for almost any fish, chicken or meat dish.

Pearl Liebman’s Spanish Rice
2 Tbsp olive oil
1 medium yellow onion, peeled and diced
1 green bell pepper, seeded and diced
2 garlic cloves, pressed or minced
8 oz tomato sauce *see note below
1 ¼ cups water
1 tablespoon ketchup
½ cup frozen peas
1 cup Uncle Ben’s converted rice
1 tsp salt
Salt and pepper to taste
In a 3-quart saucepan, heat oil over medium-high heat until it shimmers.
Add onions and peppers and season with a little salt and pepper. Sauté, stirring occasionally, until vegetables are softened, about 4 minutes.
Add garlic, and cook for about 30 seconds, stirring constantly.
Add tomato sauce, water, ketchup, peas, rice, one teaspoon of salt and a few grinds of pepper, and bring to a boil over high heat. Stir and lower heat to low. Cover and cook for 20 minutes.
Remove from heat. Mix and serve hot.
Notes:
1. Over the years, I have tried this recipe with every type of rice. Uncle Ben’s converted rice is the clear winner.
2. When you are cooking the rice, make sure you have the stove on its very lowest setting and do not lift the cover while it is steaming.
3. Tomato sauce comes in an 8-oz. can or carton. It can be found in the canned vegetable aisle at the grocery store. If you purchase low sodium tomato sauce, you will need a little more salt in the final dish, but it will still work.
Persian food is often fancy. But Jewish Journal columnist Tabby Refael holds a special place in her heart for simpler Persian foods.
“I especially love Persian patties (kotlet), those luscious, thick disks that are nevertheless fantastically stinky, especially when sent in a school lunch bag,” she said. “In Iran, my mother would send me to school with her trademark kotleh-e-gojeh (tomato and meat patties), which consisted of ground beef, turmeric and minced onion, cooked in a thick layer of tomato paste.”
Refael said, “Even my Iranian classmates held their noses when I opened my pungent sandwich bag in the Tehran heat at lunchtime. But those patties were delicious.”
In America, Refael’s mother made her famous Gondi Tabeh, which was and remains her absolute favorite Persian meat patty.
“It’s uniquely sweet, because it contains a large amount of grated carrot (and a little sugar),” she said. “And the aroma of all that cumin takes me right back to after school snack time in the U.S., happily eating my mother’s Gondi Tabeh and watching ‘Tiny Toon Adventures’ while seated cross-legged on our faux Persian rug.”
Refael continued, “Like all dishes that we love (or loved) from our mothers, this one is only and truly good when my mother prepares it. I don’t know what it is. She must add extra carrots, cumin…and love.”
Flora’s Gondi Tabeh (Persian Meat Patties with Carrots and Cumin)
1 lb ground beef
Half a large onion, grated
3/4 – 1 tsp of kosher salt
1 egg yolk
2 medium carrots, peeled and grated on the smaller side of a box grater (do not use pre-shredded carrots from the market; they need to be much finer)
4 Tbsp of chickpea flour
3 tsp of sugar
2 tsp of ground cumin
1/2 – 1 tsp of salt
Vegetable oil
In a large bowl, mix all of the ingredients (except the vegetable oil). If the mixture is too sticky, add a little more chickpea flour. Wet your hands with water (or rub them with a little oil) and form the mixture into oval-shaped patties, flattening them gently so they’re roughly four inches long and three inches wide (they will shrink a bit when cooked).
In a large, non-stick skillet, heat one tablespoon of vegetable oil over medium heat. When the oil is hot, place some of the patties in the skillet, making sure not to crowd them. Let cook until browned on each side, then flip and brown on the other side until the meat is cooked through.
Gondi Tabeh is delicious in a pita sandwich with shredded lettuce and mayonnaise. Noosheh Jan (“May your soul be satiated”).
Deborah Charnes cites cheese blintzes as her favorite food memory.
“I’ve been vegetarian since I was 16 (vegan since I was in my 50s),” Charnes, author of “From the Boxing Ring to the Ashram,” told the Journal. “Every time my grandmother — from Plonsk, Poland, and a relative of David Ben-Gurion — would come visit, I gobbled up her cheese blintzes.”
Given her vegetarian diet, when she visited Plonsk, Warsaw and Krakow, Poland, it wasn’t easy to find good food.
“I ate cheese blintzes at a lovely quiet cafe in a park in Krakow,” she said. “My grandmother’s were infinitely better. She packed them with farmer’s cheese, and her dough was eggy, not like a flimsy French crepe.”
These days, she recreates her grandmother’s blintz recipes for family get-togethers, like Hanukkah.
“I’ve even tried to make vegan gluten-free versions,” Charnes said. “But my grandma Ruth’s recipe, which my mom fortunately saved, by far looks the best.””
Nana’s Cheese Blintzes
Filling:
2 packages Farmer’s Cheese
1-2 tbs sugar
a pinch of cinnamon
1 egg, beaten well
Blend all the above.
Dough:
1/2 cup flour
1 tsp sugar
1/2 cup water
1/4 cup milk
4 well-beaten eggs
Whisk or blend all the above.
Make each “omelette” with 3 T batter in a well-greased pan. Fry lightly. Turn over. Put a spoonful of filling in the center of the cooked side of each pancake. Fold sides over filling. Cook in a buttered pan until golden brown. Place cooked blintzes on a large tray or plates. Sprinkle with cinnamon and/or sugar if desired.
Rachel Riederman’s food memory also comes from her grandmother, who, she says, was a force of nature and a great cook.
“There are so many dishes I wish she could make for me again, and her stuffed cabbage is one of them,” Riederman, author of “Once Upon a Rind in Hollywood: 50 Movie-Themed Cheese Platters and Snack Boards for Film Fanatics,” told the Journal. “It was a dish everyone looked forward to at her holiday meals and clamored for the leftovers to take home with them.”

Grandma Claire’s World-Famous Stuffed Cabbage
1 large head of green cabbage
4 lbs ground beef
2 large eggs
Salt
Pepper
4 cloves garlic, minced
3 large yellow onions, chopped
1/4 cup bread crumbs or cornflake crumbs
3/4 cup water
1/2 14 oz can tomato sauce + 1 28 oz can tomato sauce
28 oz can crushed tomatoes
1/2 cup fresh squeezed lemon juice
1 cup honey or sugar
1 cup Golden raisins
Two days before cooking, wash, dry and then freeze a head of cabbage. Let thaw for two hours before beginning preparation.
In a large bowl, add the beef, eggs, salt, pepper, garlic, 1/3 of the chopped onions, bread crumbs, water and the 1/2 can of tomato sauce. Combine with your hands.
Carefully remove leaves from the cabbage head. Stuff leaves with 2 tablespoons of the ground meat mixture. Roll like a burrito and close using a toothpick.
In a large pot, over medium heat, saute the garlic with the remaining chopped onions until golden. Add the large can of crushed tomatoes, large can of tomato sauce and salt and pepper to taste. Bring to a simmer, then stack in the stuffed cabbages. Cook covered for 1 hour.
Add lemon juice, honey or sugar and raisins. Cook another 2 1/2 to 3 hours, shaking the pot often to keep even cooking. Liquids should remain above the cabbage. If needed, add more water or tomato sauce.
Let cool before removing the stuffed cabbages with a slotted spoon.
Growing up, Lisa Niver’s mom cooked healthy food for her and her sister.
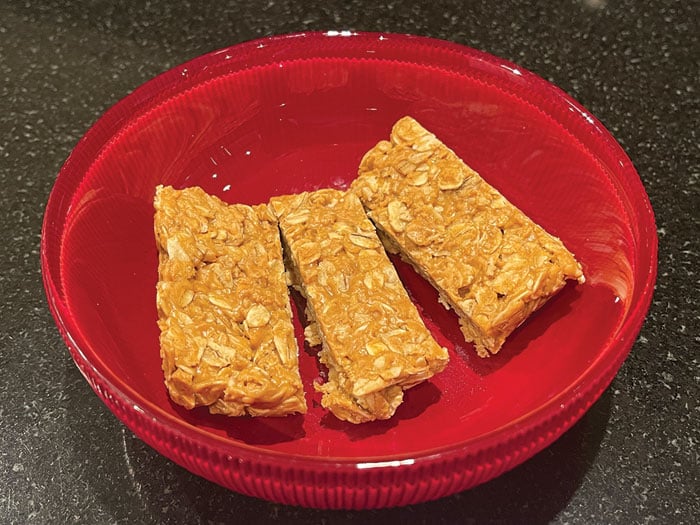
That meant wheat flour, not white; honey, not sugar; fresh fruits and veggies,” Niver, who is a travel writer and author of “Brave-ish,” told the Journal. “And she made homemade granola bars with hearty ingredients.”
Niver used to take Crunchola every day to school.
“I loved that my mom made our snack for us from scratch,” she said. “I still eat it and my sister now makes it for her kids.”

Crunchola
1 cup peanut butter
1 cup granola
½ cup honey
Heat peanut butter. Then mix all ingredients together.
Pour into a greased pan.
Refrigerate for a few hours, slice and serve.
When Amy S. Margulies was growing up, she and her mom made lemon bars for Mother’s Day.
“We loved the flavor, the color and being in the kitchen together,” Margulies, owner of Rebellious RD, told the Journal. “As I started to cook more as an adult and a dietitian, I created a strawberry take on the original lemon bars.”
Margulies lightened up the original recipe. It has less butter. Plus, she included some healthy fat and strawberries, which add vitamin C, manganese, folate, potassium and antioxidants.
“It is like a strawberry mousse on top of a shortbread cookie,” she said. “They continue to be our favorite Mother’s Day treat!”
Strawberry Squares
2 cups strawberries, hulled, washed, halved
3/4 cup whole wheat flour
1/4 cup powdered sugar
3 Tbsp pine nuts, lightly toasted
1/8 tsp sea salt
2 Tbsp chilled unsalted butter, cut into small pieces
2 Tbsp canola oil
Nonstick cooking spray
3/4 cup granulated sugar
2 Tbsp all-purpose flour
1/2 cup freshly squeezed lemon juice
2 large eggs + 1 large egg white
2 Tbsp powdered sugar
Preheat the oven to 350°F
Place strawberries in a blender or food processor and purée. Pour into a medium bowl, and set aside.
Add whole wheat flour, 1/4 cup powdered sugar, pine nuts and salt to the blender or food processor, and pulse 2 to 3 times to combine.
Add the butter and canola oil and pulse another 4 or 5 times or until the mixture is crumbly.
Spray 8 x 8 baking dish with nonstick cooking spray.
Add mixture from the blender and press evenly to create a bottom layer in the pan. Bake for 20 minutes or until lightly browned. Remove from the oven and reduce oven temperature to 325°F.
Mix granulated sugar, 2 tablespoons flour, lemon juice, eggs and egg white into the strawberries, stirring with a whisk until smooth. Pour mixture over crust and place in oven. Bake for 20 minutes or until set.
Remove from the oven and cool completely. Cover and chill in the refrigerator for at least 2 hours. Sprinkle it with powdered sugar and slice into 16 squares.
Enjoy and Happy Mother’s Day!


