
One of my favorite crafts when I was a little kid was string art. I remember my fourth-grade teacher helping me pound nails into a piece of wood in a circular pattern, and then I would go from nail to nail with a length of yarn, zigzagging to my heart’s content until I got a pattern that was like a three-dimensional version of my Spirograph.
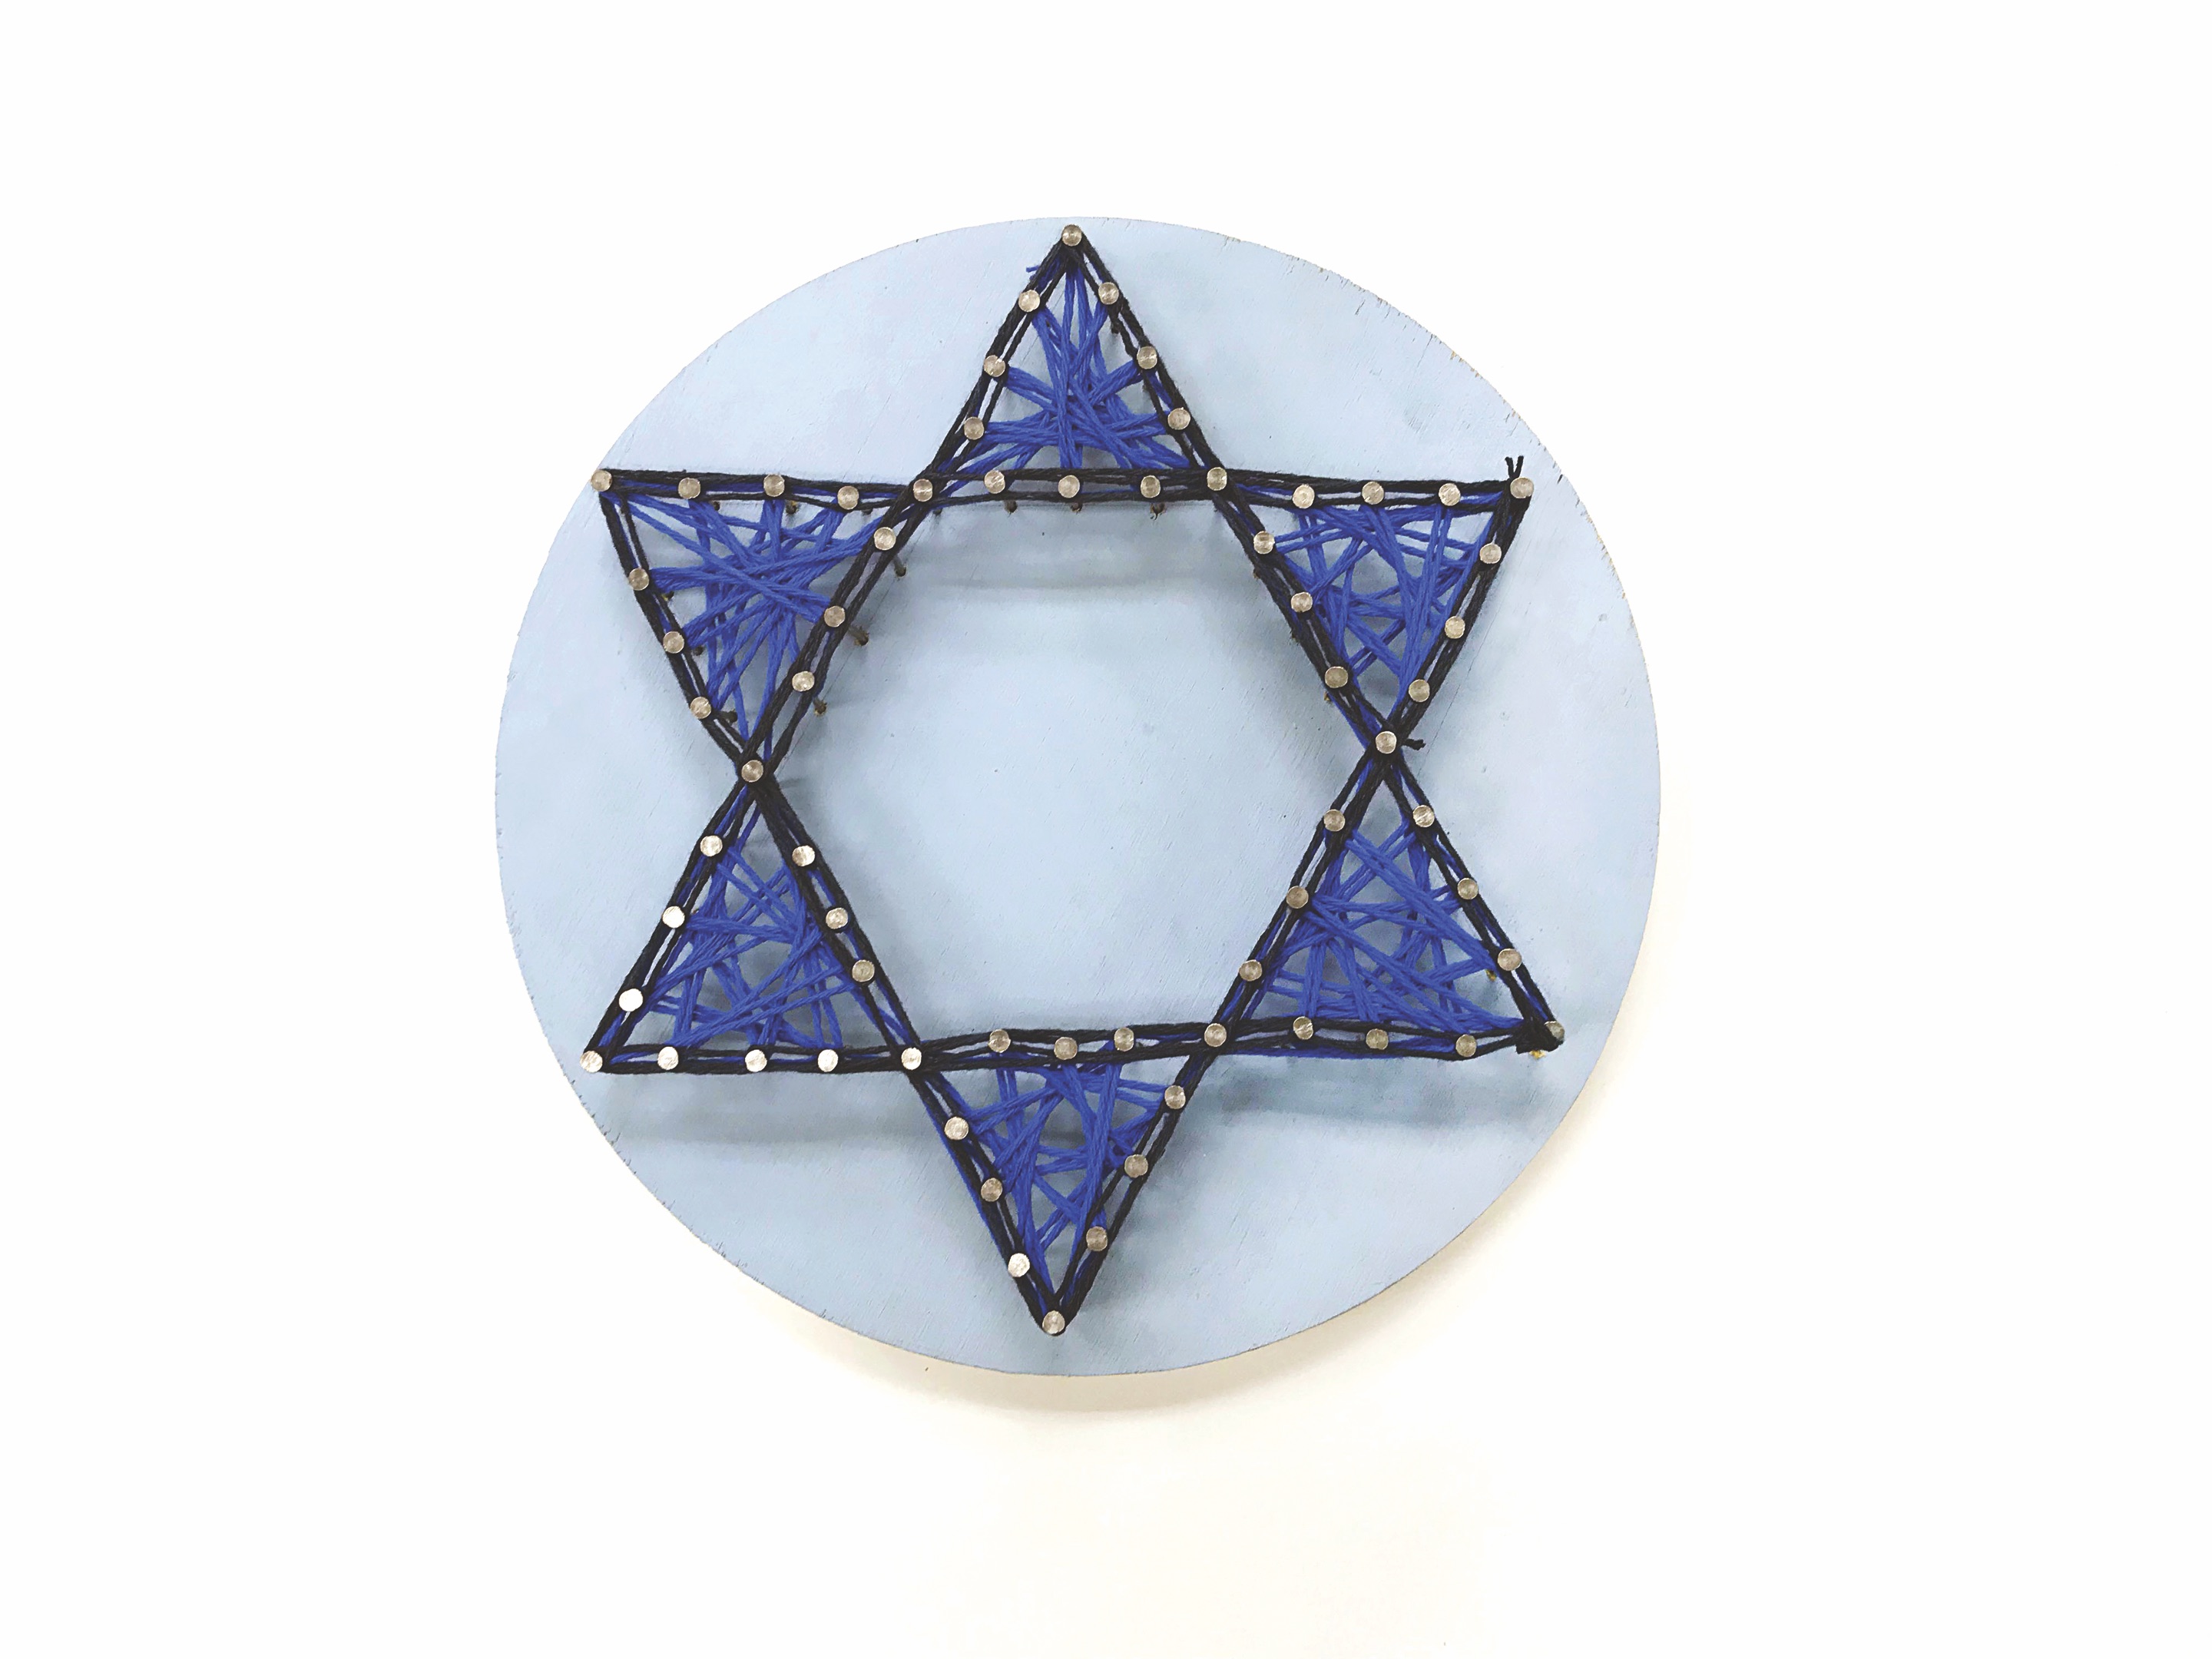
Now that I’ve grown up (well, physically anyway — maybe not mentally), I’ve continued to do string art, sometimes in wall-size installations. I’ve discovered you can also make string art in the shape of practically anything, such as states, your initials, or as in this example, the Star of David.
What you’ll need:
Wood board
Acrylic paint
Paintbrush
Pencil
Ruler
Drill
Nails
Hammer
Yarn in two colors
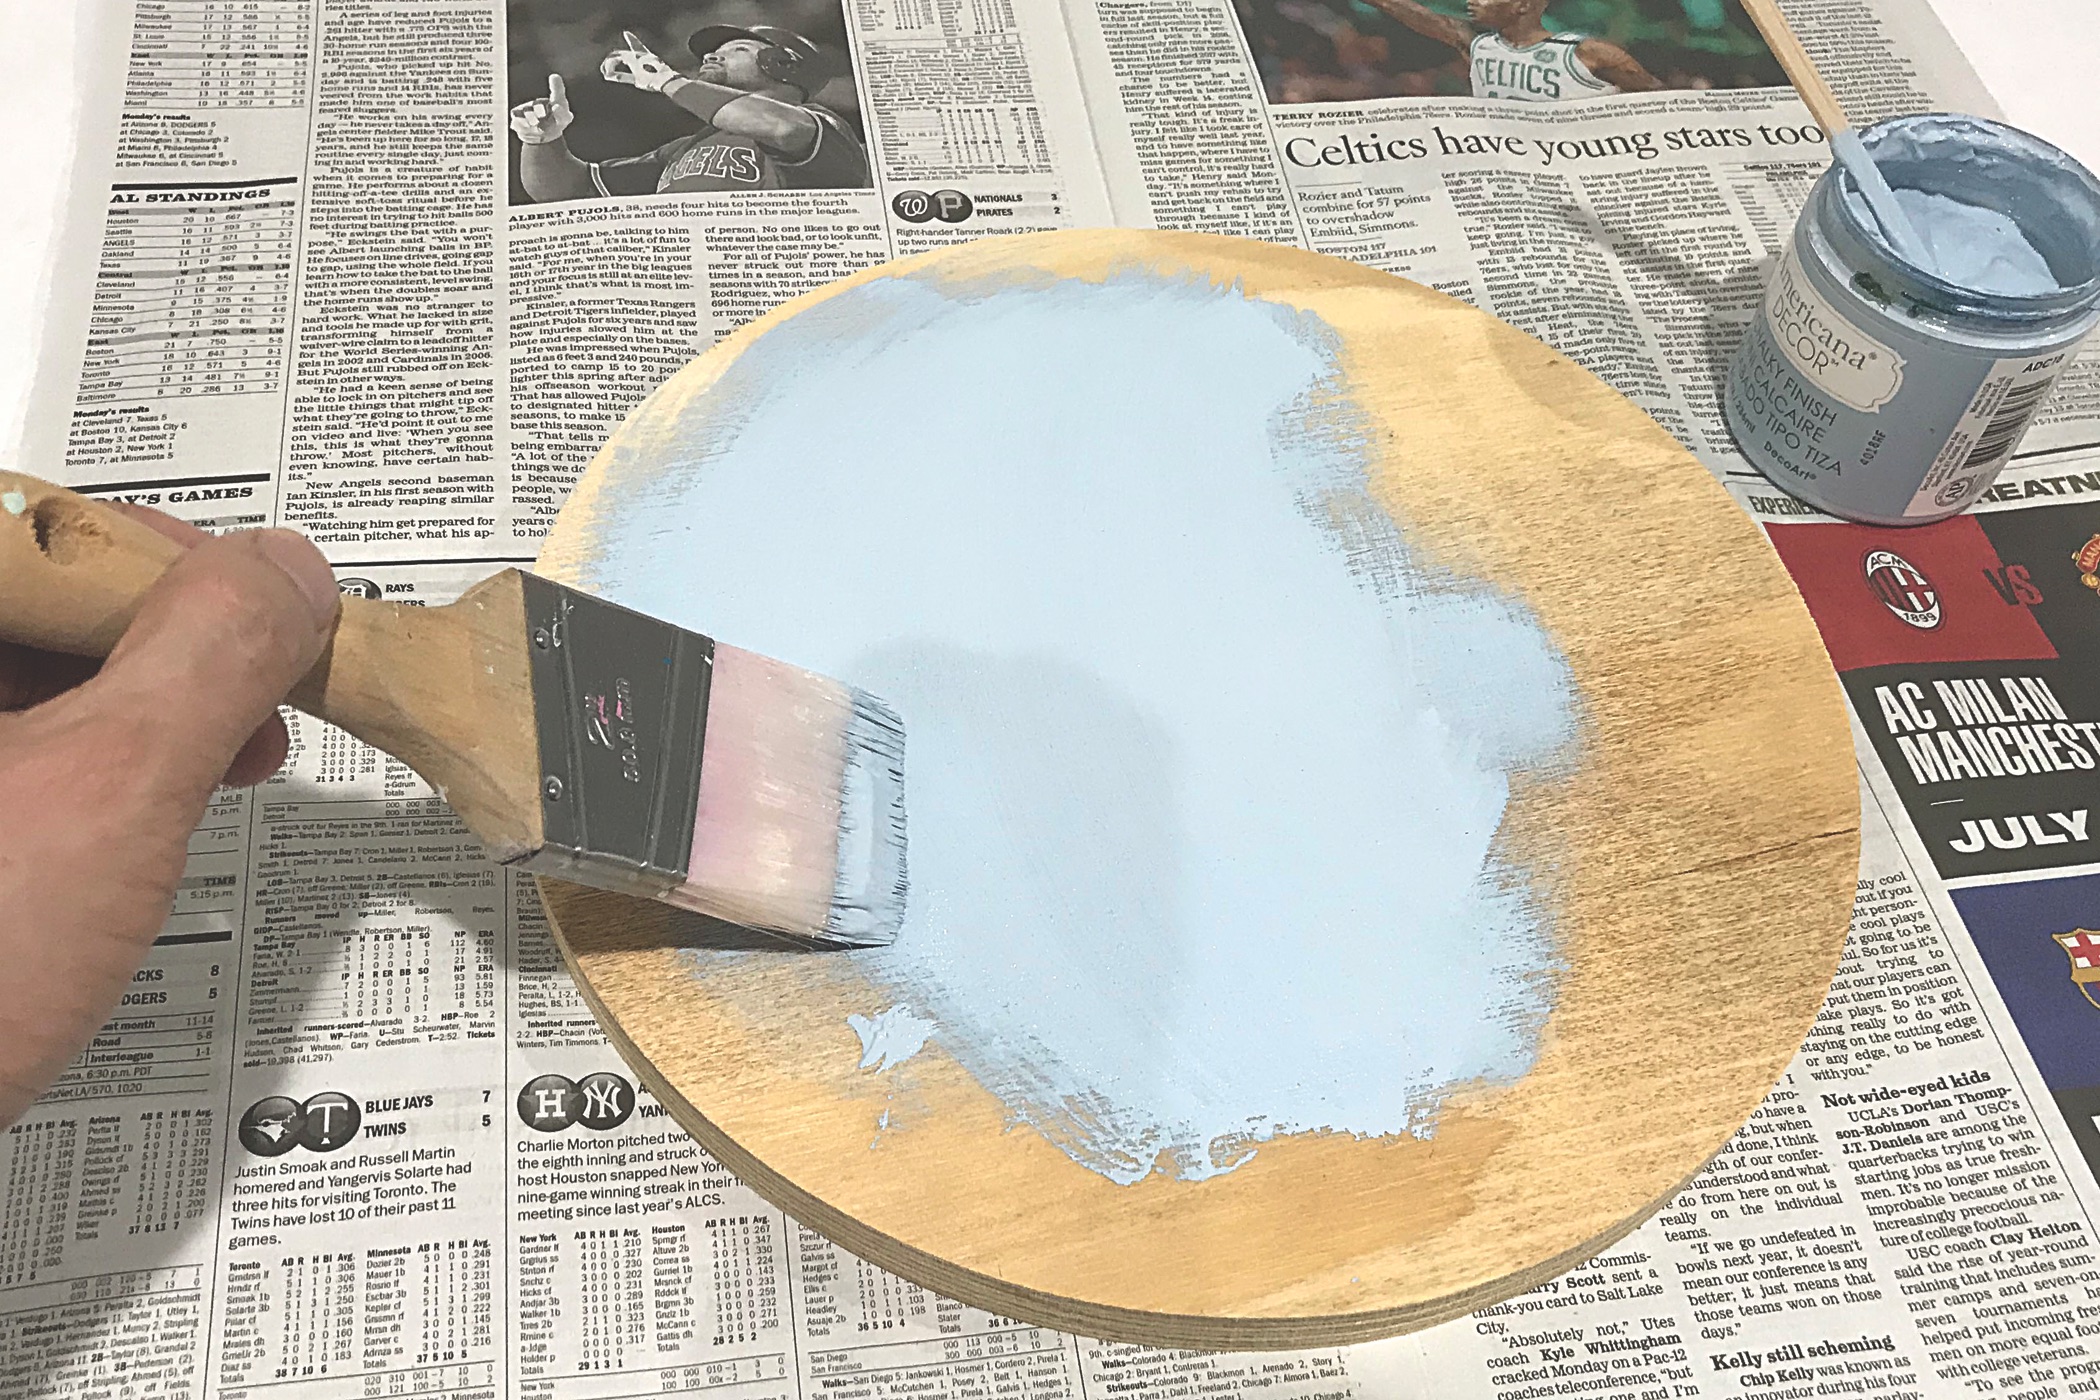
1. Start with a wood board. Circular saws and I are not good friends, so I bought this pre-cut 12-inch diameter board at Orchard Supply Hardware for about $5. You can leave it unfinished, or paint it like I did with acrylic paint.
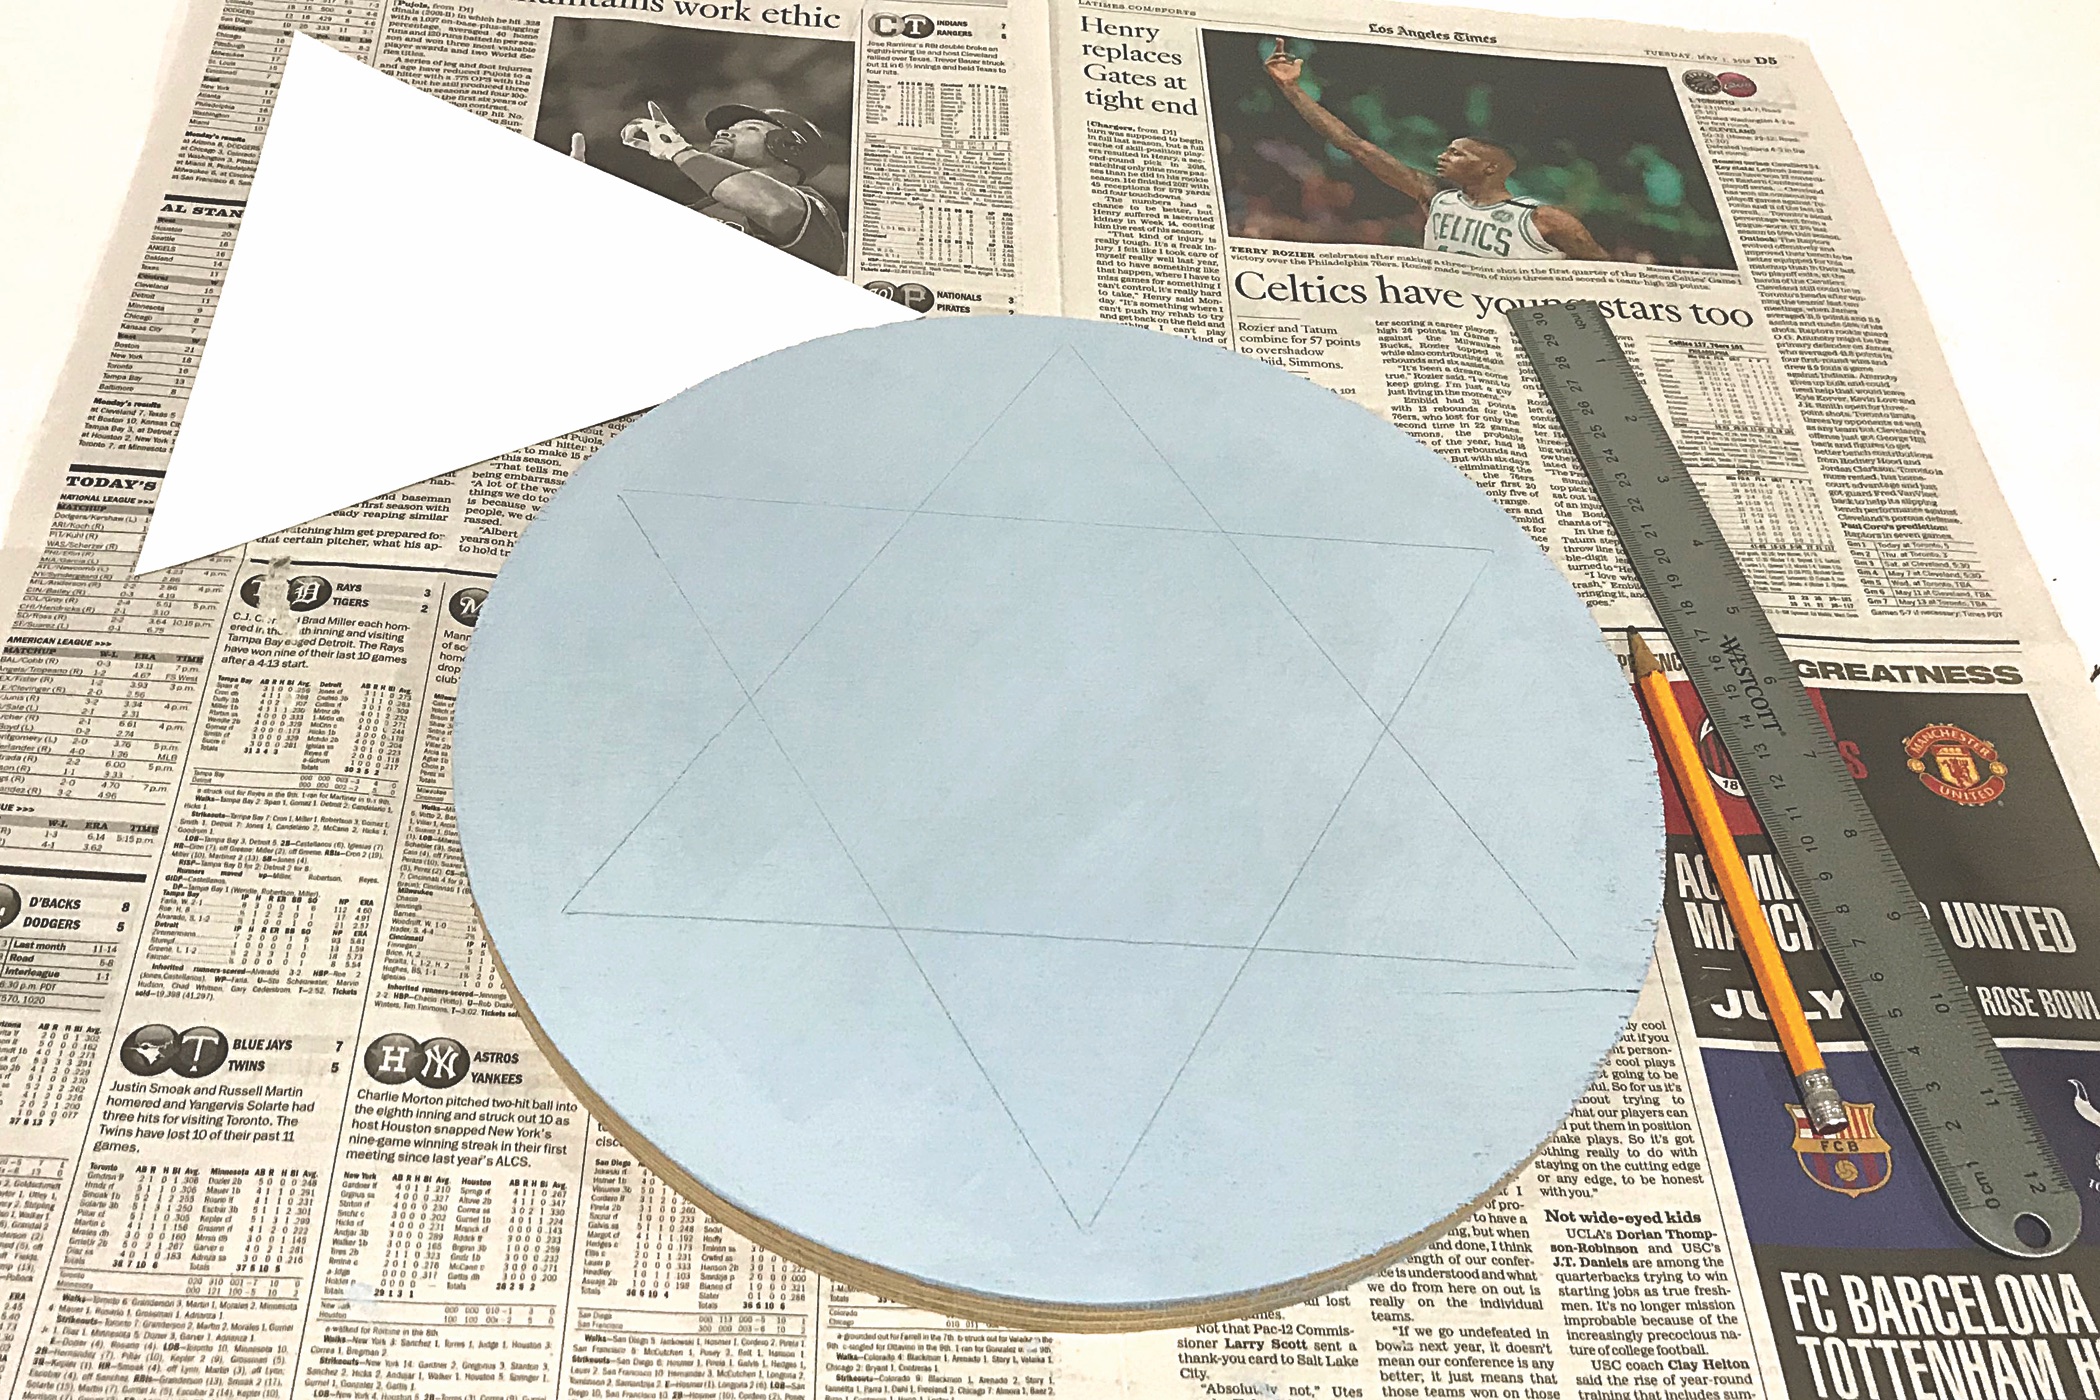
2. Draw a Star of David on the board. To do this, I cut out a triangle from a piece of paper and traced it on the board with a pencil. Then I rotated the triangle 180 degrees and traced it again to form the star.
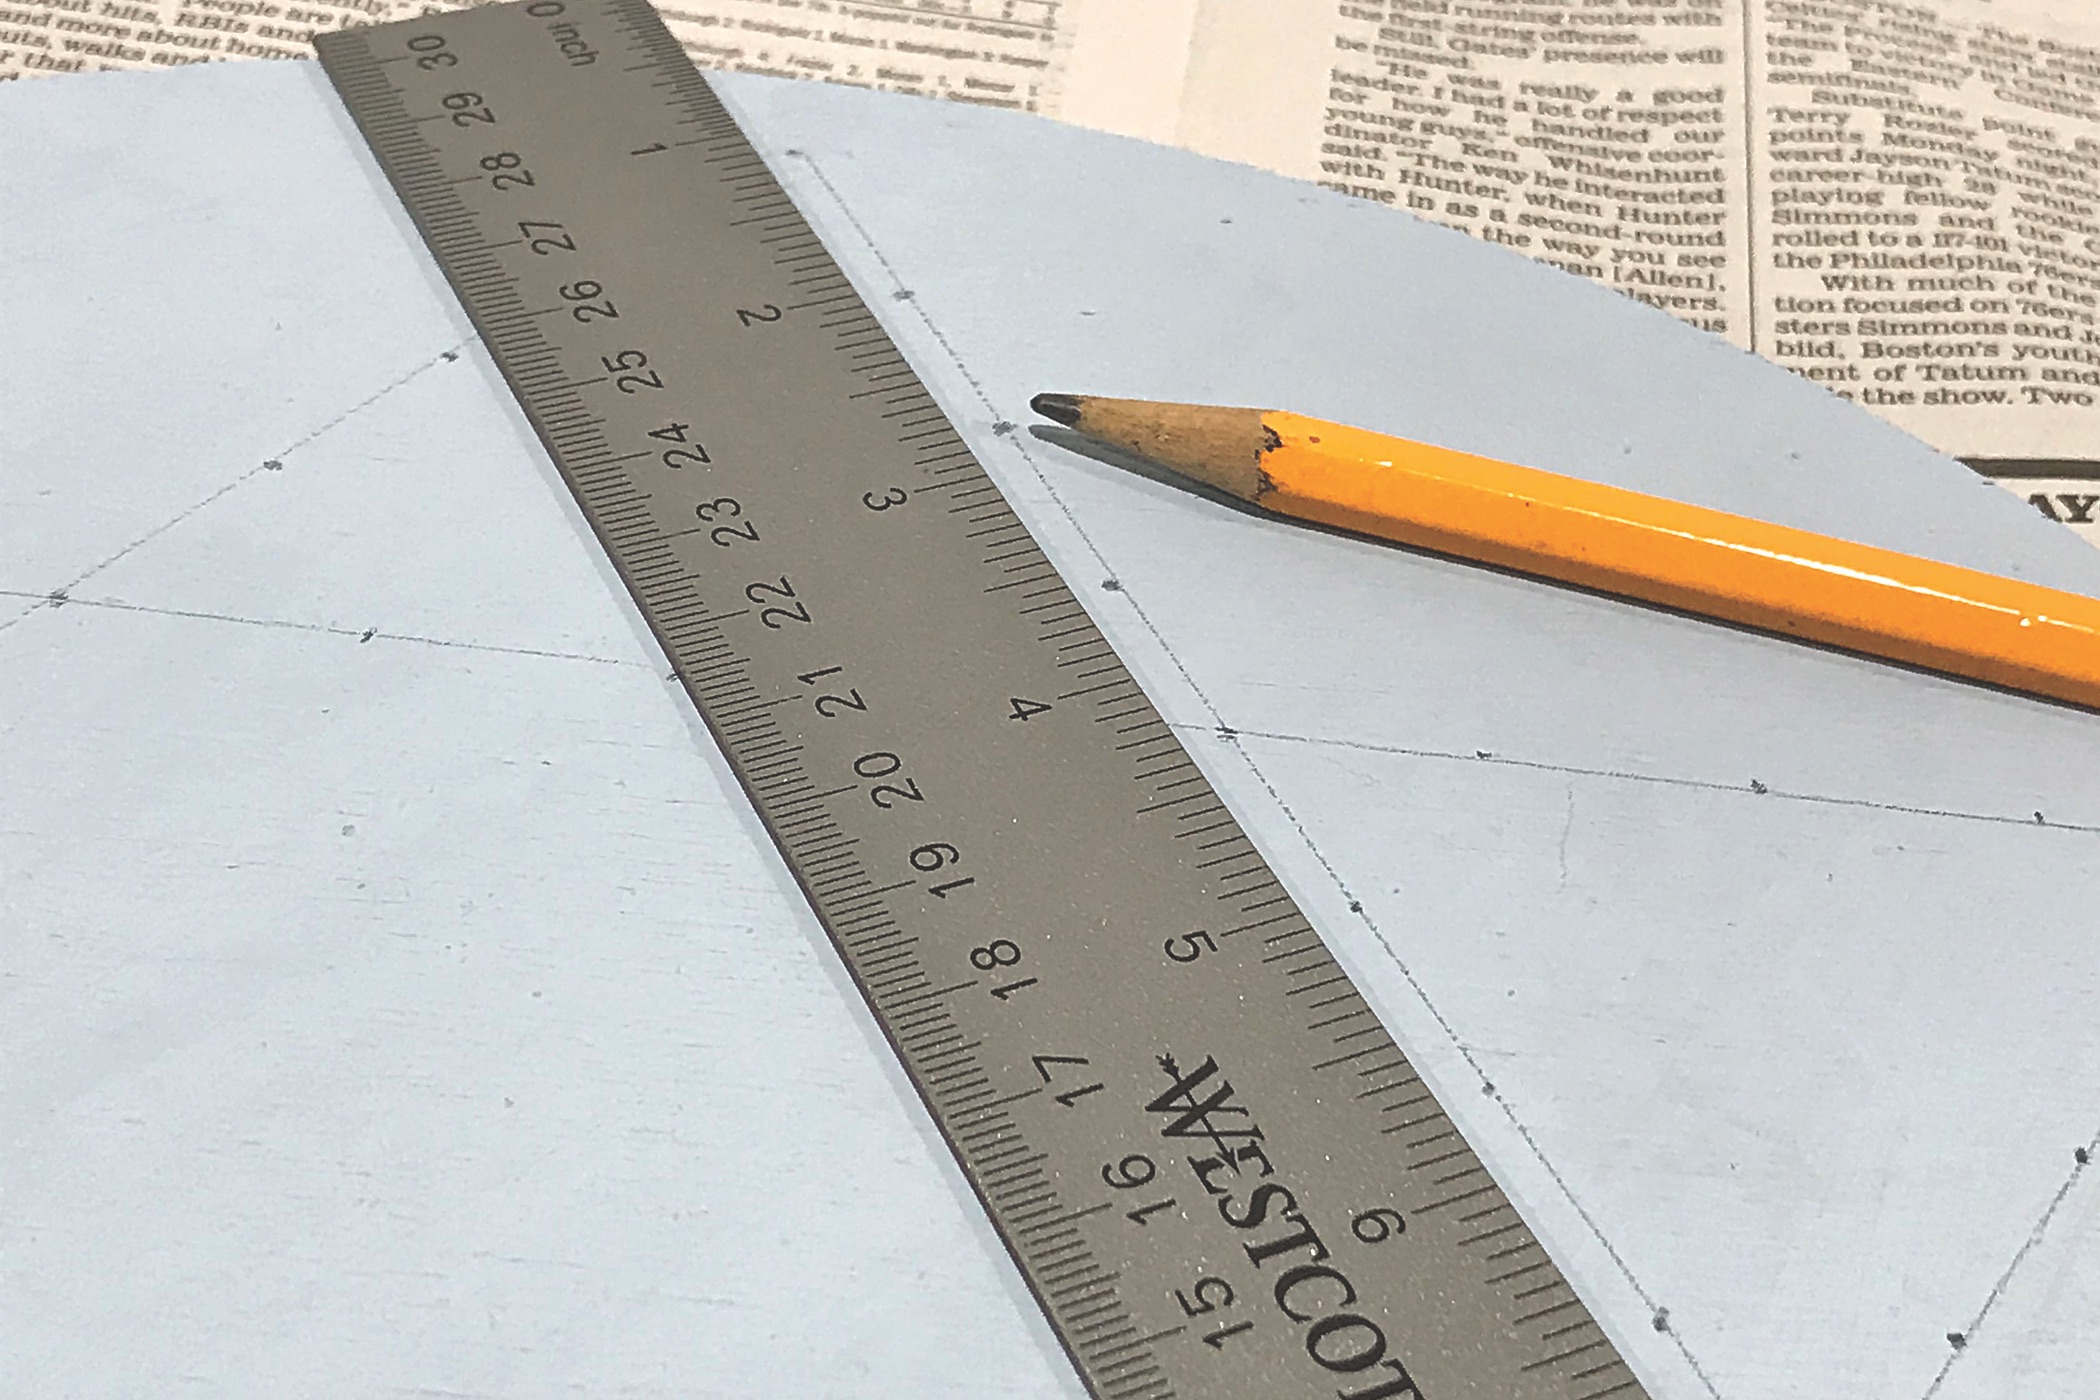
3. Using a ruler to help you measure, place a mark about every 3/4ths of an inch along the Star of David. These marks indicate where the nails will go.
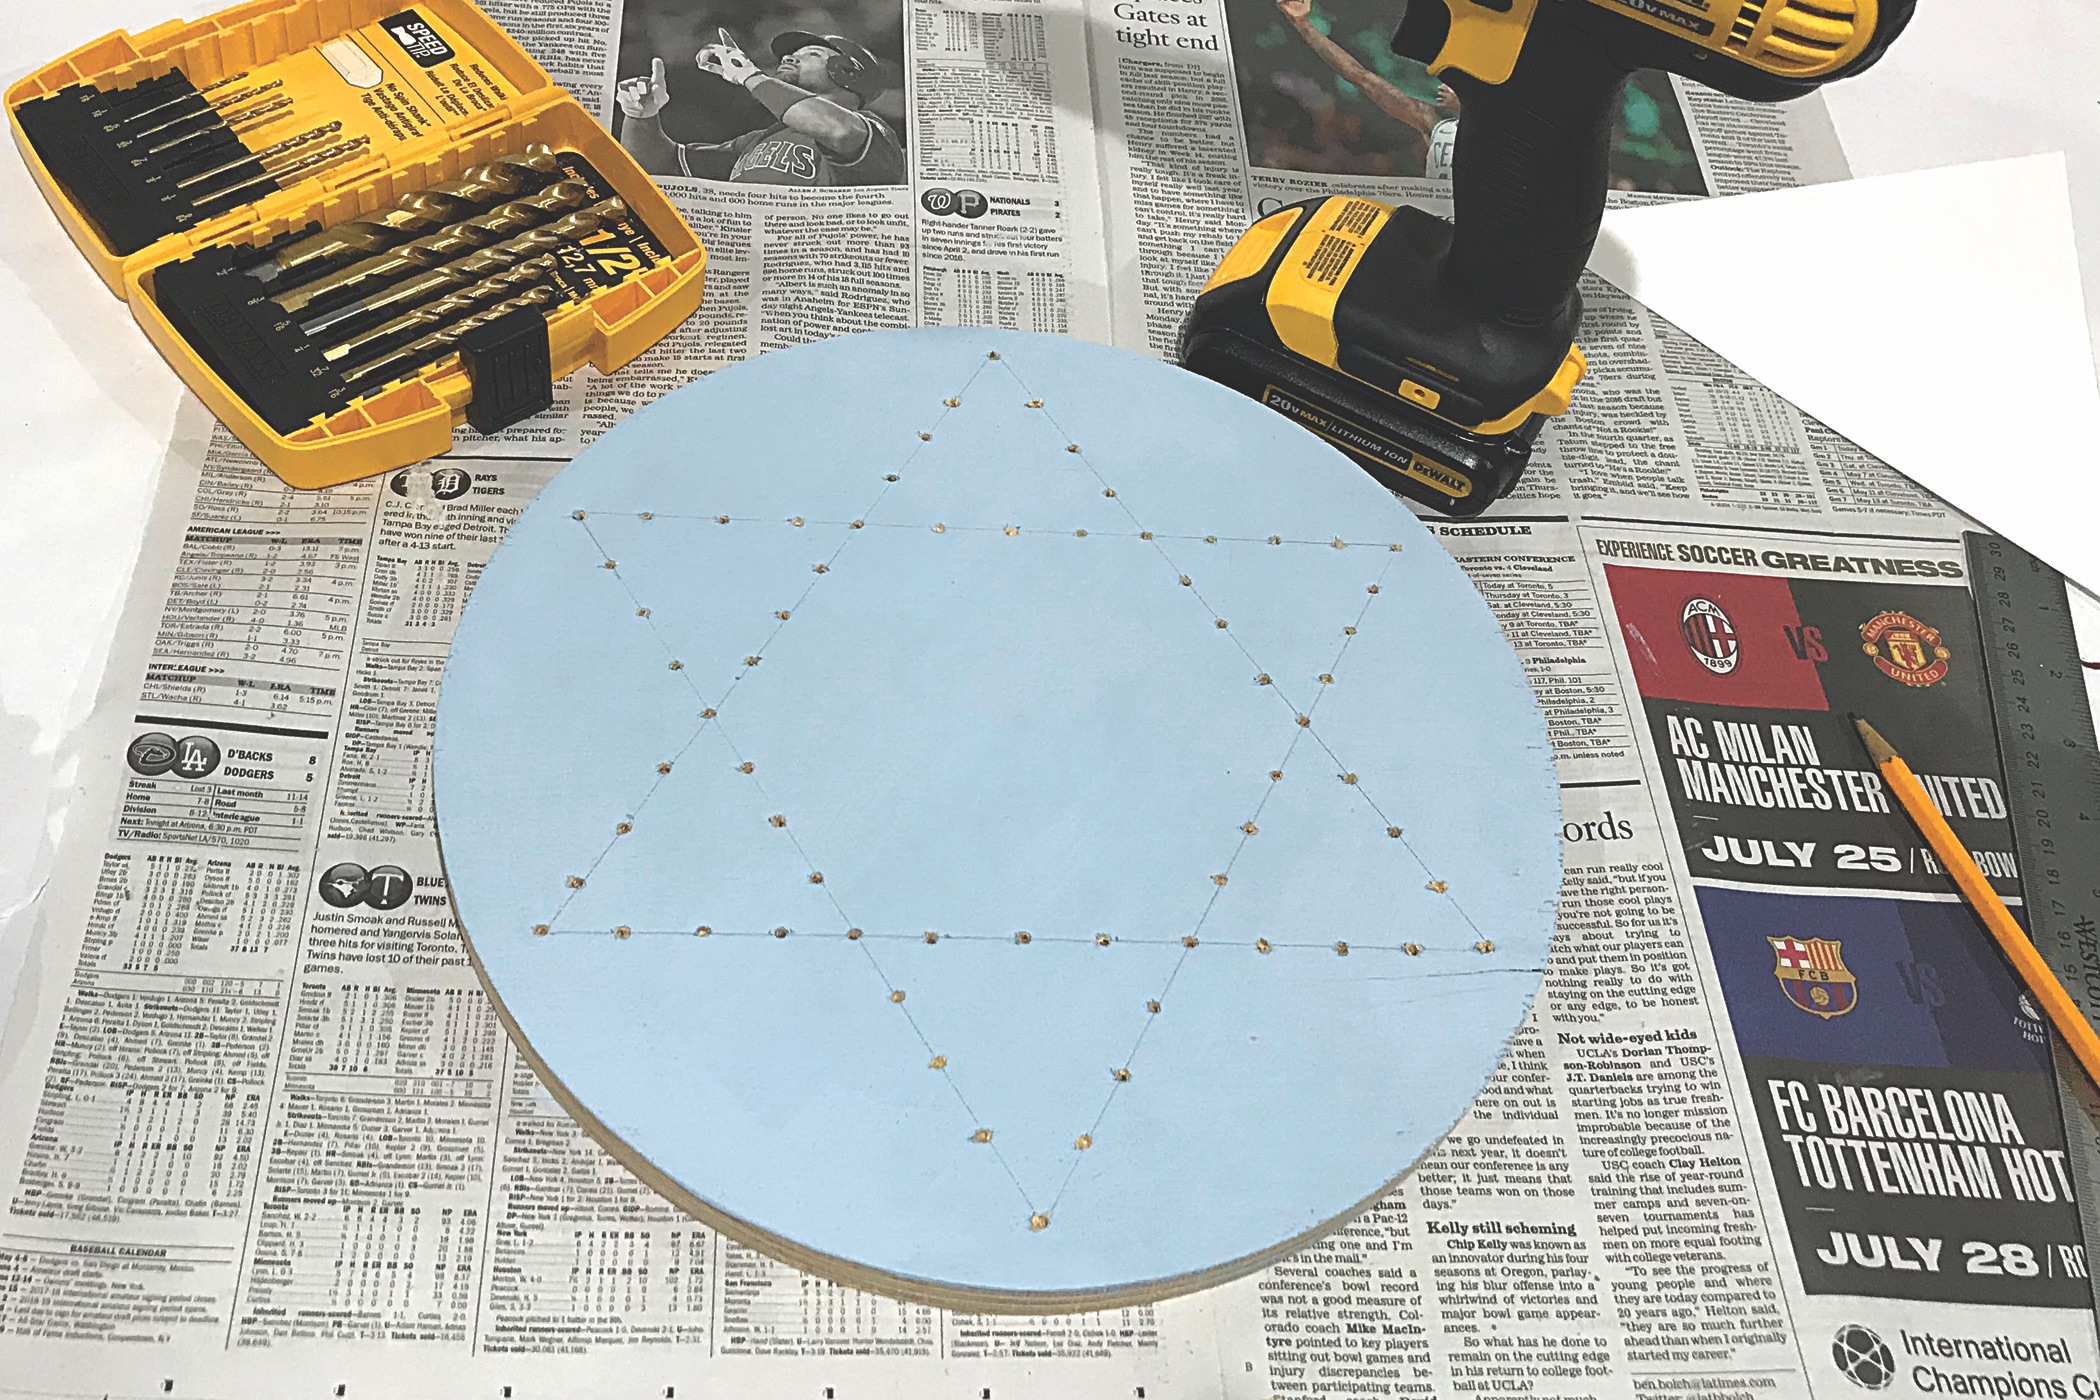
4. Drill a small hole at each mark. This step is optional — it just helps you to insert the nails later.

5. Drive a nail into each hole on the board. Try to hammer the nails straight up and down, and to the same depth. As you’ll see, the nail heads provide a nice design element to the finished art.
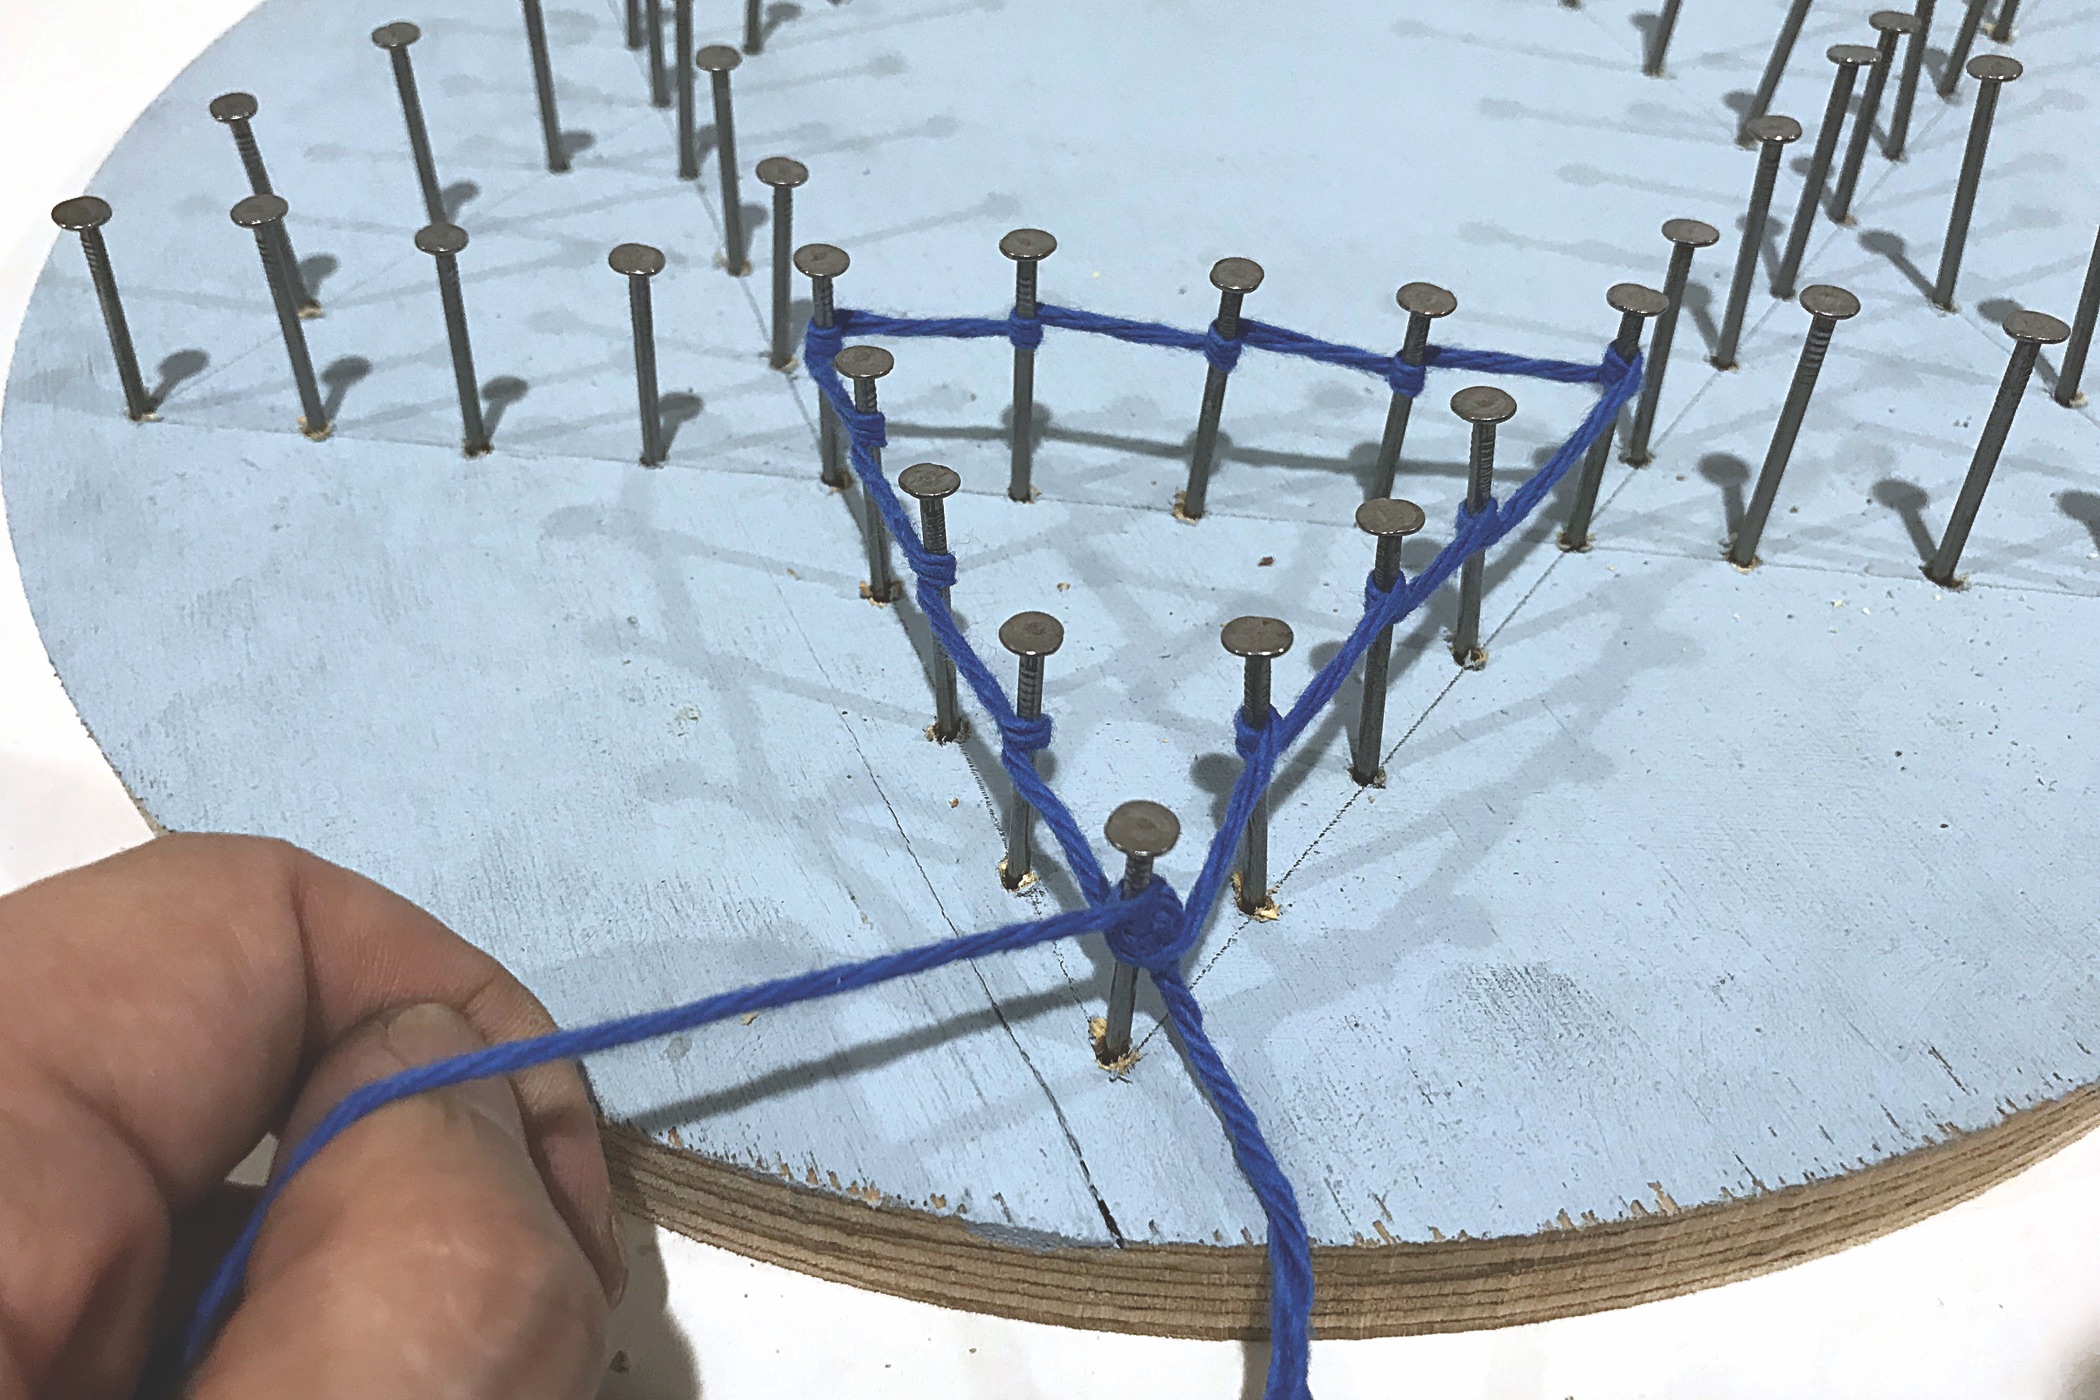
6. Now it’s time to string. Working one triangle of the star at a time, tie one end of the yarn to a nail. Then form a triangle with the yarn, looping the yarn around each nail.
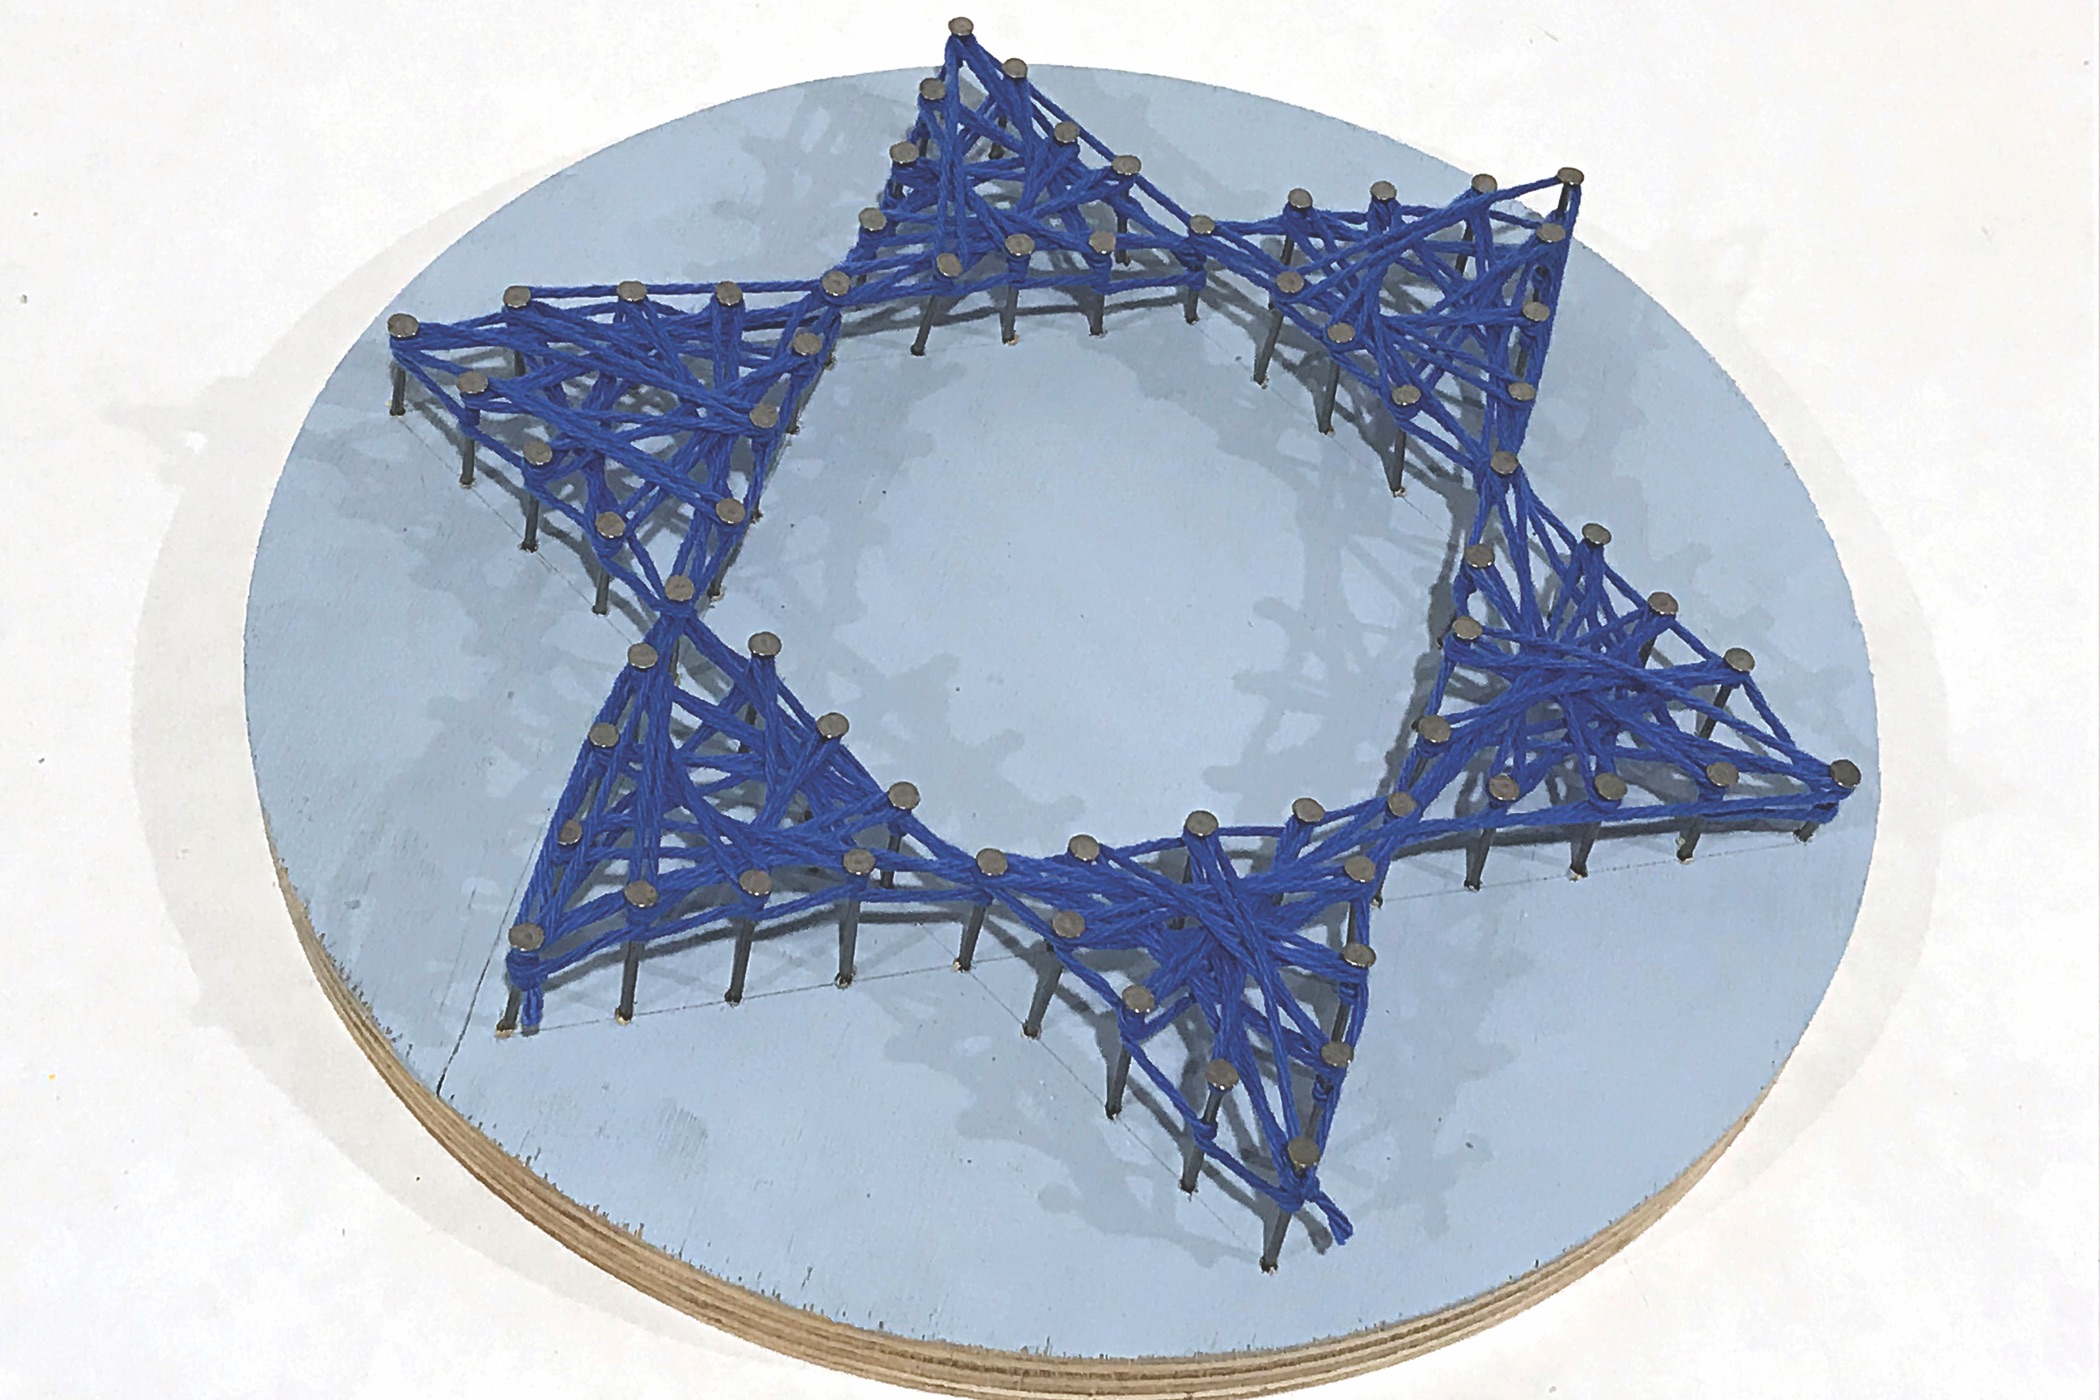
7. After the outer triangle is formed, fill in the middle by zigzagging the yarn back and forth between nails that are opposite each other. When one triangle is finished, move on to the adjacent one until all six triangles are done. Tie a double knot at the end to secure the yarn to the final nail.
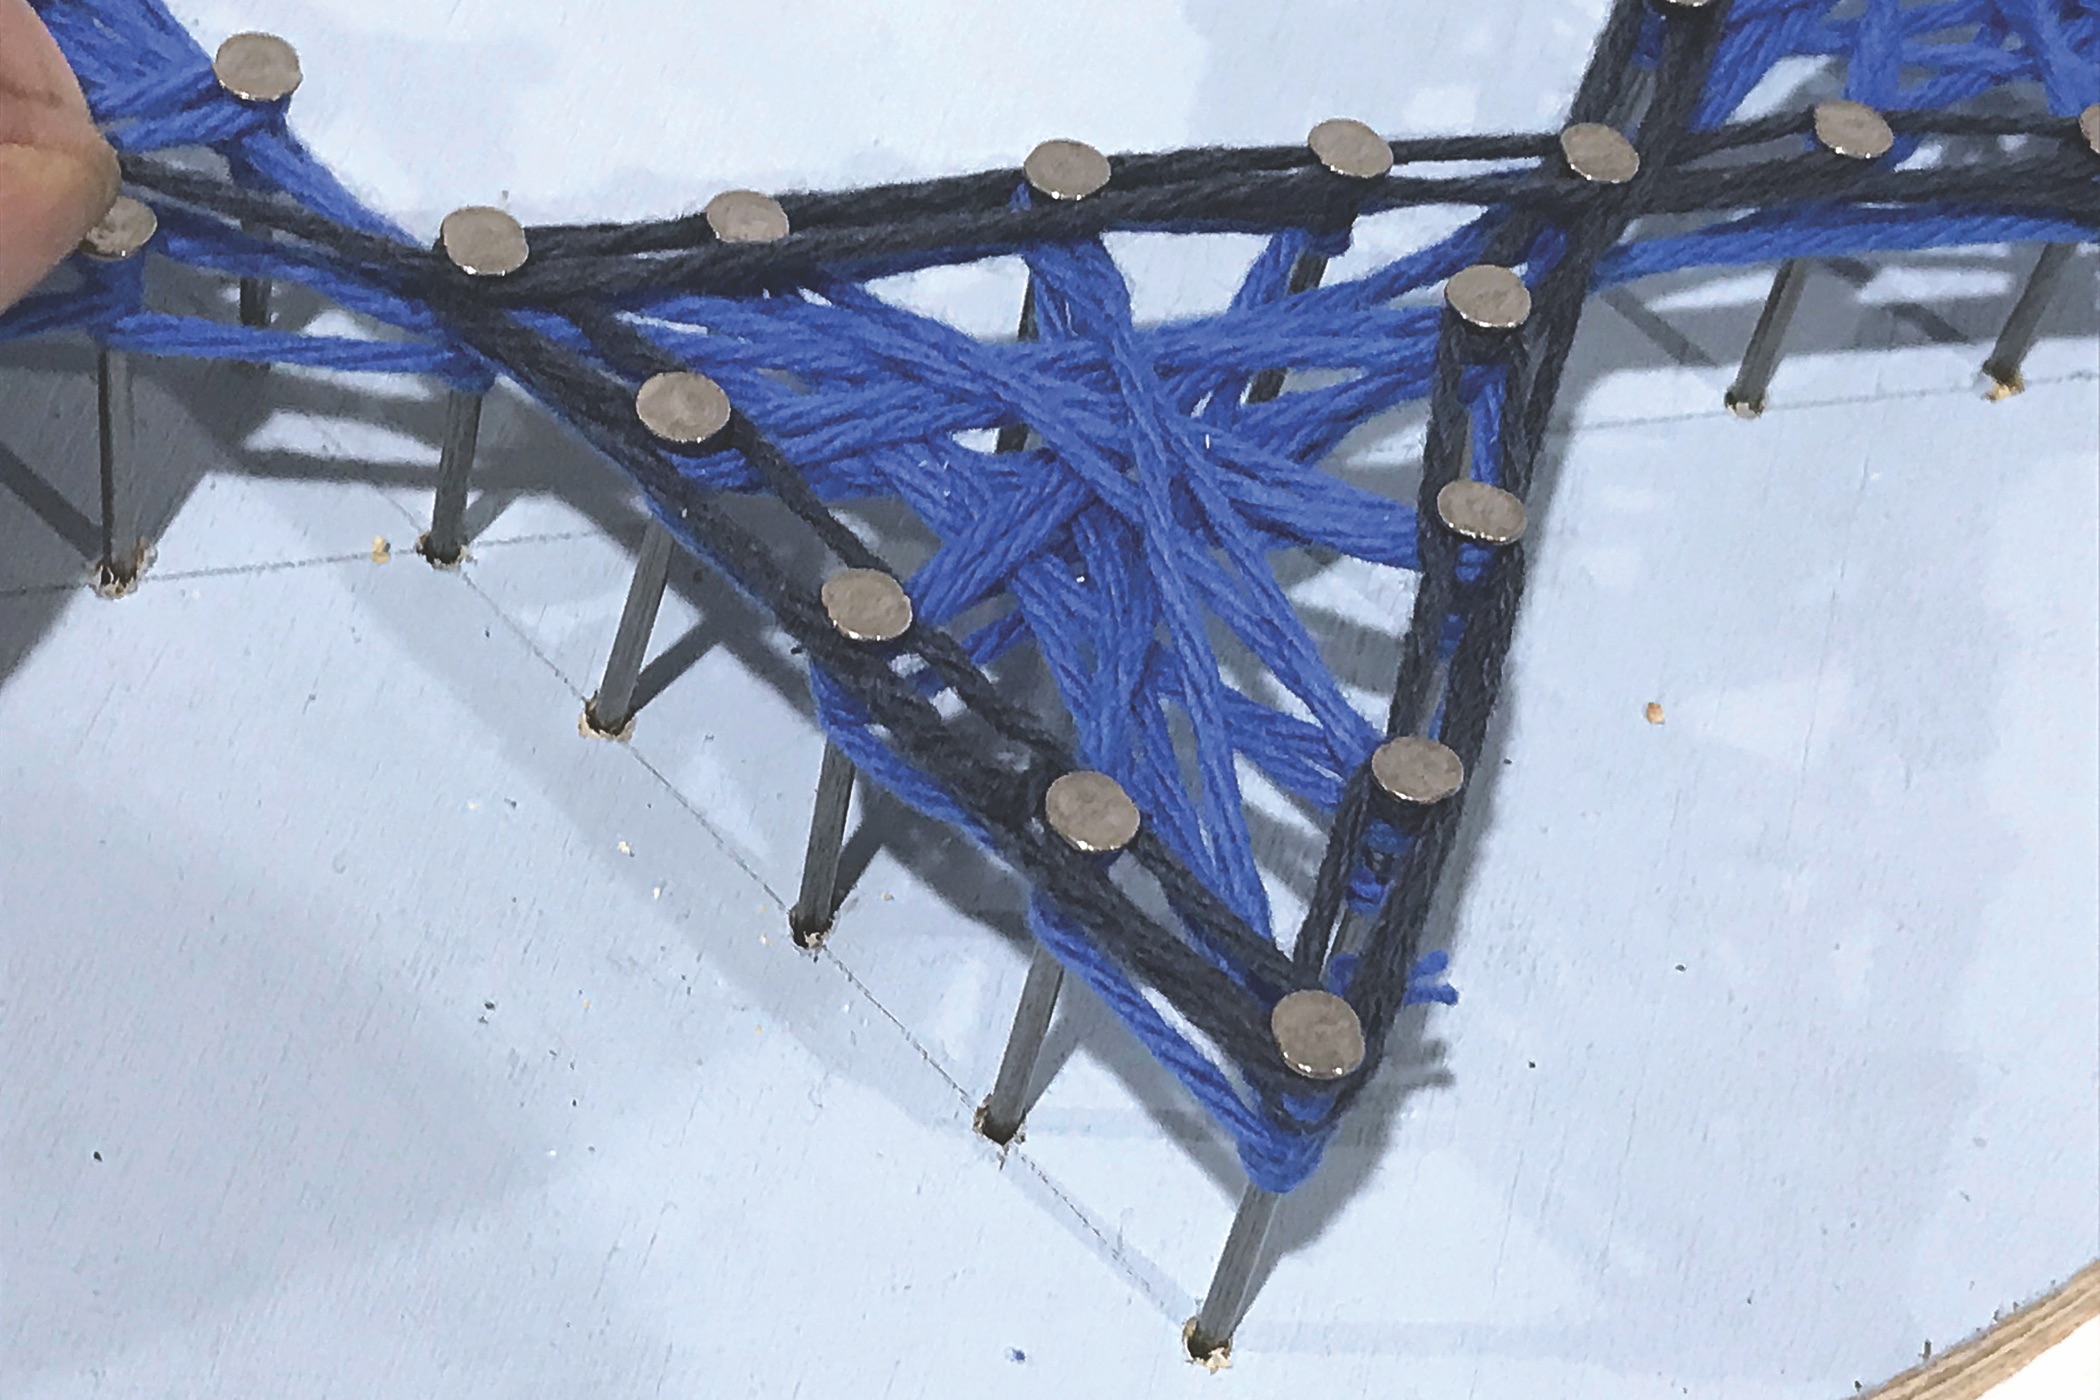
8. With a second color of yarn that is darker than the first, outline the Star of David by wrapping the yarn around the nails delineating the actual shape, overlapping the lighter-color yarn that is already there.
Jonathan Fong is the author of “Flowers That Wow” and “Parties That Wow,” and host of “Style With a Smile” on YouTube. You can see more of his do-it-yourself projects at jonathanfongstyle.com.


 More news and opinions than at a Shabbat dinner, right in your inbox.